
If you’ve been following along with my closet makeover, you already know that I decided to take on one of my biggest DIY projects yet transforming my closet using IKEA PAX wardrobes.
I love IKEA PAX because it gives you an amazing starting point for a custom closet without the custom-closet price tag. But I didn’t want my finished closet to immediately scream “IKEA.” I wanted it to look like it had been designed and built specifically for our space.
So after installing the PAX units, building them up on a base, securing everything and adding trim and face frames, the next big step was paint.
And if you have ever wondered:
Can you actually paint IKEA furniture?
Yes! You absolutely can.
But painting IKEA furniture is a little different from painting regular wood furniture. The surface is extremely smooth, and if you simply grab leftover wall paint and start rolling, there is a very good chance that paint will eventually scratch or peel.
The secret isn’t really the paint.
It’s the prep.
So I’m sharing exactly how I painted my IKEA PAX wardrobes, what products and tools you need, what I would absolutely not skip, and all the little things that can help you get a smooth, durable, custom-looking finish.
Why Is IKEA Furniture Difficult to Paint?
Before we start painting, it helps to understand what you’re actually painting.
Many IKEA pieces including PAX wardrobes aren’t made from unfinished solid wood. The PAX frames use materials such as particleboard and fiberboard with a paper-foil finish.
That smooth factory surface is one of the reasons IKEA furniture is so easy to wipe clean, but it also means regular paint doesn’t have much texture to grab onto.
Think of painting a piece of raw wood versus painting something very slick.
Paint can penetrate and grip raw wood much more easily. On a slick IKEA surface, we have to create that grip ourselves.
That’s where cleaning, sanding and most importantly a good bonding primer come in.
What You’ll Need
Here are the basic supplies I recommend having before you start:
- Deglosser or mild cleaning solution
- Clean microfiber cloths or rags
- Sandpaper or sanding sponges
- Approximately 180–220 grit sandpaper for scuff sanding
- 220-grit or finer sandpaper for smoothing between coats
- Orbital or detail sander, optional
- Shop vacuum, optional
- Tack cloth or slightly damp microfiber cloth
- High-adhesion bonding primer
- Small foam or microfiber paint roller
- Good-quality angled paintbrush
- Paint tray
- Cabinet, trim or furniture paint OR THIS one
- Painter’s tape
- Drop cloths
- Respirator or appropriate mask when sanding or using products that require one
- Gloves
- Screwdriver/drill for removing hardware
- Small bags and labels for hardware
For my closet, I also had MDF/wood trim and face-frame pieces that needed to blend seamlessly into the IKEA PAX units. That means there are different materials meeting each other, which makes proper priming even more important.
Step 1: Finish Your Construction First
If you’re creating a built-in IKEA PAX closet like mine, I recommend completing as much of the construction work as possible before your final paint.
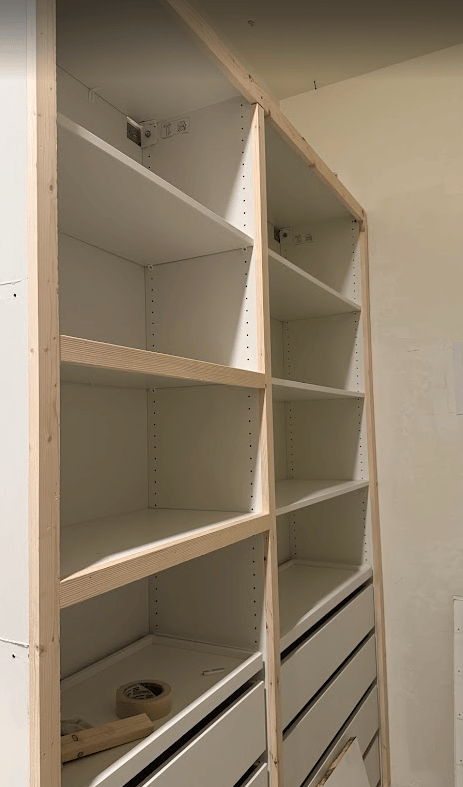
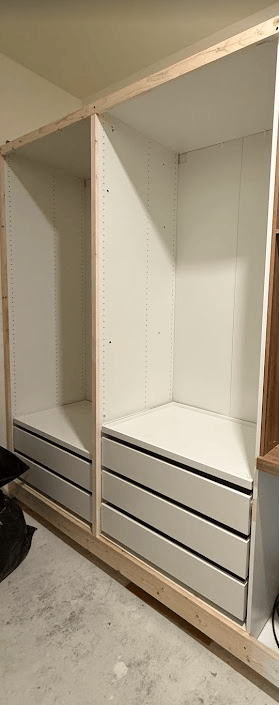
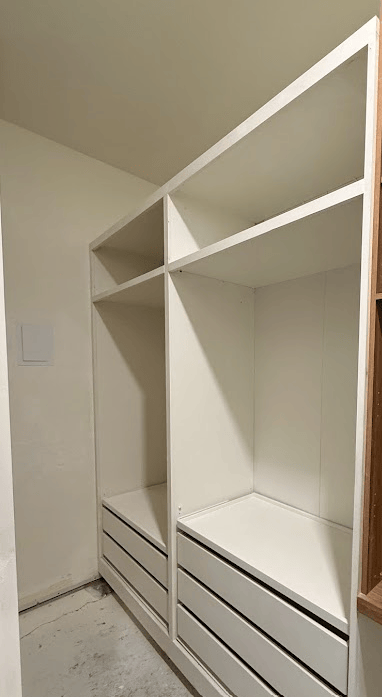
For my closet, I first assembled the PAX units on the base I had built. Then I added trim and 1×2 face-frame pieces around the units to make everything look much more custom.
This is where the magic starts happening.
Those relatively inexpensive pieces of trim visually connect multiple IKEA cabinets so they start reading as one large built-in closet instead of individual wardrobe boxes.
Before painting, make sure:
- Your units are properly positioned.
- Everything that needs to be secured is secured.
- Your face frames are installed.
- Nail holes have been filled.
- Seams that need filling have been addressed.
- Trim work is complete.
- Any caulking you’re planning to do is finished and cured according to the manufacturer’s instructions.
Don’t rush into paint because you’re excited to see the color.
I know. This is the hardest part!
But paint is really the finishing layer. Every bump, hole, rough joint and unfinished seam underneath can become even more noticeable once everything is painted.
Step 2: Remove Anything That Will Make Painting Difficult
If you’re painting an IKEA piece before assembling it, life is much easier.
But if your PAX wardrobes are already assembled—as mine were—you can absolutely paint them in place.
Remove anything that you don’t want to paint or that will make it difficult to reach the surface.
This can include:
- Shelves
- Drawers
- Doors
- Clothing rods
- Handles
- Hinges
- Interior accessories
Label everything.
This seems unnecessary when you’re taking everything apart.
Then three days later you’re standing in a room surrounded by IKEA hardware wondering which screw belonged to which drawer.
Ask me how I know.
Use painter’s tape to label pieces and put hardware into labeled zip-top bags.
Step 3: Clean Everything REALLY Well
Do not sand or prime a dirty surface.
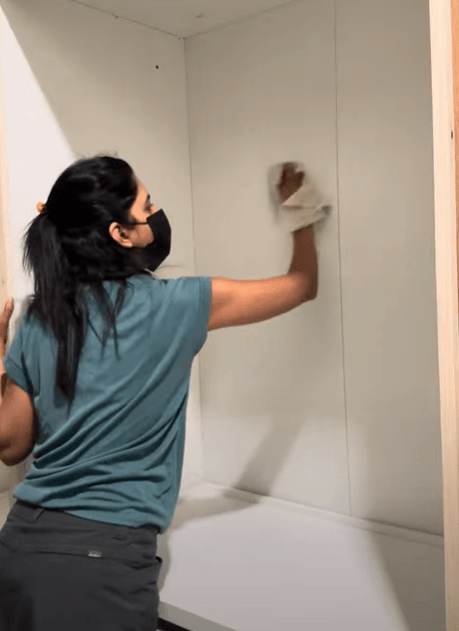
Even brand-new IKEA pieces can have dust, fingerprints and residue from assembly. If you’ve been using the furniture for a while, there may also be oils, cleaning-product residue or grime on the surface.
Clean every area you’re planning to paint.
Pay special attention to:
- Drawer fronts
- Shelf edges
- Areas around handles
- Corners
- Cabinet edges
- Anywhere you’ve repeatedly touched during installation
Once everything is clean, allow the surfaces to dry completely.
Why cleaning matters
Primer needs to bond to the IKEA finish not to a microscopic layer of dust or grease sitting on top of it.
This entire project is about creating the strongest possible bond between the existing surface, primer and paint.
Step 4: Degloss the Surface
This step can be optional depending on your primer and prep method, but for very slick furniture I like giving myself every possible advantage.
A liquid deglosser can help dull the factory finish before sanding.
Follow the manufacturer’s directions carefully because application and drying instructions vary by product.
And remember:
Deglosser isn’t an excuse to skip all the other prep.
For a closet that will get daily use, I still prefer physically scuffing the surface before priming.
Step 5: Lightly Sand the IKEA Surface
This is one of the most important steps.
You do not want to aggressively sand through the factory surface.
The goal is simply to remove some of that slickness and create microscopic scratches that give the primer something to grab.
For most of my IKEA painting projects, I prefer a light scuff sand rather than trying to strip the surface.
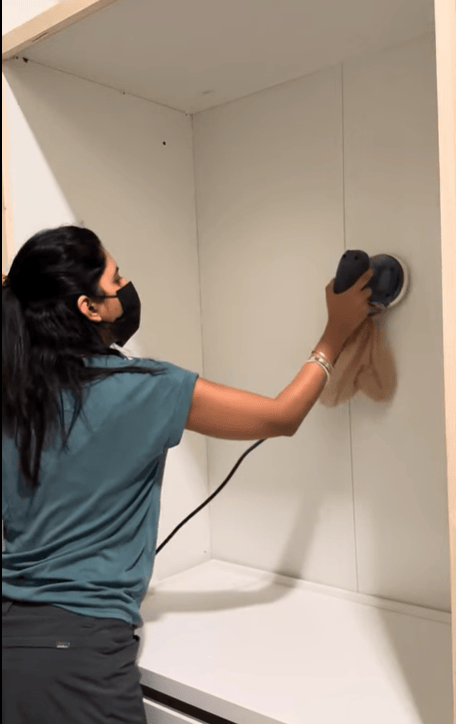
A sanding sponge works well around corners and edges, while an orbital or detail sander can speed things up on large flat areas. Since I was working on the entire closet space, I used my orbital sander to speed things up
Be careful around edges!
IKEA surfaces are not the same as a thick piece of solid wood.
Don’t sit in one place with your sander trying to remove the finish.
Keep it moving and use light pressure.
You’re trying to make the surface dull, not destroy it.
When you’re finished, run your hand across the surface. It should no longer feel quite as slick and glossy.
Do You Really Have to Sand IKEA Furniture Before Painting?
If you want the most durable finish possible, I would not skip it.
There are primers marketed as being able to stick to slick surfaces with minimal prep, but a closet gets touched, bumped, rubbed and used constantly.
This isn’t decorative furniture sitting untouched in a corner.
You’re opening drawers.
You’re sliding hangers.
You’re moving baskets.
You’re putting shoes away.
You’re bumping things against cabinet edges.
For the relatively small amount of extra work involved, scuff sanding is worth it.
Step 6: Remove ALL the Sanding Dust
This is another small step that makes a huge difference.
Vacuum first, especially around corners and seams.
Then wipe the surfaces with a tack cloth or a clean, slightly damp microfiber cloth.
Look across the surface from an angle.
If you can still see sanding dust, don’t prime yet.
Dust left underneath your primer can create bumps and imperfections that you’ll spend even more time sanding out later.
Step 7: Prime Your IKEA PAX
If there is one product I would not skip when painting IKEA furniture, it’s primer.
You need a primer designed to adhere to slick or difficult surfaces.
A popular choice for IKEA furniture is Zinsser B-I-N Shellac-Based Primer, which is known for strong adhesion and stain blocking.
Make sure you’re using any shellac-based product with appropriate ventilation and following the manufacturer’s current safety and application instructions.
How I apply primer
I like to use a brush for:
- Inside corners
- Detailed areas
- Tight spaces
- Edges
Then I immediately go over the larger flat surfaces with a small foam or fine-finish roller.
This helps eliminate obvious brush marks.
The biggest primer mistake?
Applying too much.
Several thin coats will almost always look better than one thick coat.
A thick coat can create:
- Drips
- Roller texture
- Ridges
- Uneven drying
- Longer curing time
Use thin, controlled coats.

Don’t Forget the MDF and Trim
This was particularly important with my PAX project because I wasn’t just painting IKEA cabinets.
I had also added trim and face frames to create the built-in look.
Raw MDF can absorb primer differently than the finished IKEA surface.
You may notice that after the first coat, your IKEA pieces and trim don’t look identical.
Don’t panic.
That’s normal.
The goal of your primer coats is to eventually create one consistent base across all those different materials.
Pay particular attention to MDF edges because they can absorb a surprising amount of primer and become fuzzy.
If that happens:
- Prime the edge.
- Let it dry.
- Lightly sand it smooth.
- Prime again if necessary.
Once painted, the IKEA frame and your added trim should visually disappear into one another.
And THAT is what gives you the built-in look.
Step 8: Let the Primer Do Its Job
This may be the most boring step in the entire project.
It’s also one of the most important.
Wait.
Primer can feel dry to the touch long before it has developed the adhesion you want.
Don’t assume “dry” and “cured” mean the same thing.
Always follow the recoat and cure instructions for the specific primer you’re using.
For a project this large, I would rather give my primer extra time than rush into paint and discover later that the layers underneath never bonded properly.
Step 9: Sand the Primer Smooth
Once your primer is sufficiently dry for sanding according to the manufacturer’s instructions, inspect everything.
Don’t automatically sand aggressively.
Look for:
- Roller texture
- Dust nibs
- Brush marks
- Drips
- Raised MDF fibers
- Rough spots
Use fine sandpaper around 220 grit works well to gently smooth those imperfections.
You are not trying to remove your primer.
You’re simply refining the surface.
Then remove every bit of sanding dust again.
This is one of those steps that feels incredibly tedious when you’re doing an entire closet.
But when light hits those big painted cabinet surfaces later, you’ll be glad you did it.
Step 10: Choose the Right Paint
Technically, you can paint IKEA furniture with many types of interior paint.
But for a closet, I strongly recommend using a durable paint designed for cabinets, doors or trim.
Why?
Because these paints are formulated for surfaces that get handled regularly.
Closet cabinetry gets far more wear than a wall.
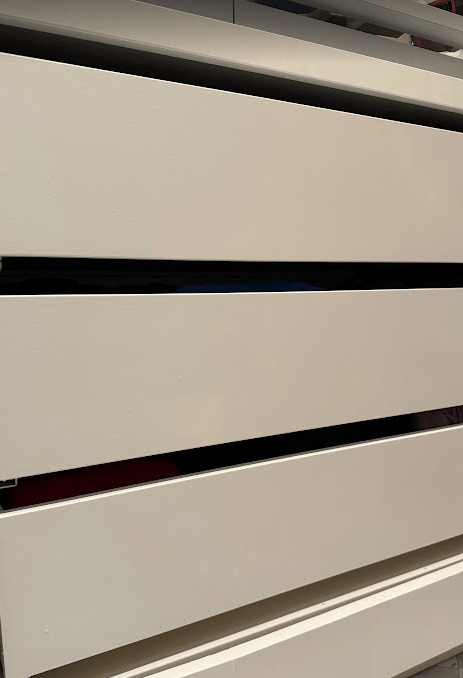
I also prefer a finish with a little sheen, such as satin, rather than a completely flat finish.
A satin finish is:
- Easier to wipe clean
- More resistant to everyday wear
- Appropriate for cabinetry
- Still soft enough to give that high-end built-in appearance
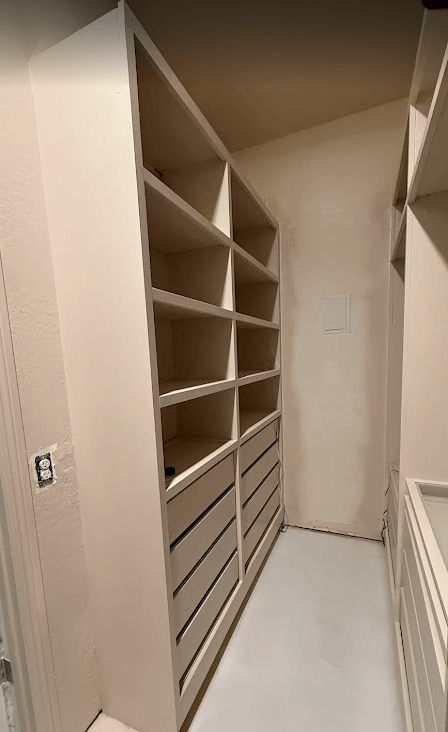
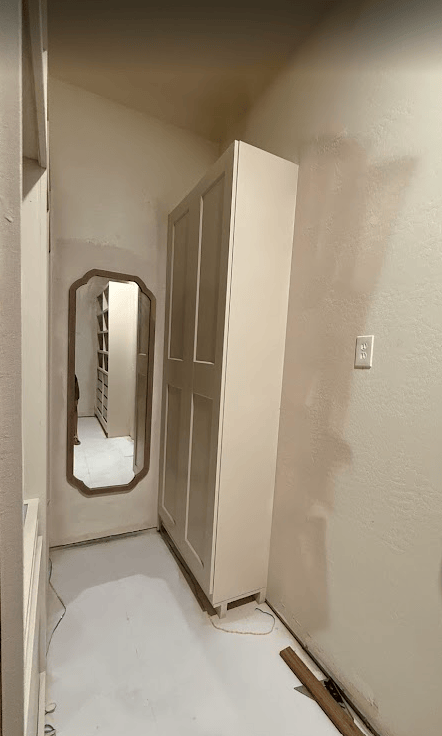
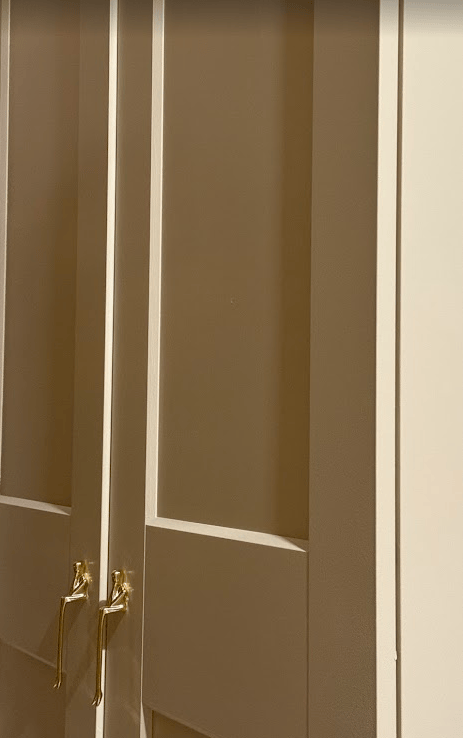
We used Sherwin Williams Emerald Urethane Trim Enamel and used the color Natural Linen
Step 11: Brush the Corners First
When it’s finally time for paint, work in manageable sections.
Start with your angled brush and paint:
- Corners
- Seams
- Around trim
- Areas the roller can’t reach
Don’t paint every corner of the entire closet and then come back hours later with your roller.
Work section by section so you can blend the brushed areas into the rolled areas while the paint is still workable.
Step 12: Roll the Large Areas
For the larger PAX surfaces, use a small high-quality foam or fine-finish roller.
Again:
Thin coats. Thin coats. Thin coats.
It’s tempting to load your roller because you want immediate coverage.
Don’t.
The first coat does not have to look perfect.
Your goal is to slowly build a smooth finish.
Roll with consistent pressure and avoid repeatedly going back over paint once it has started setting.
The more you mess with partially drying paint, the more texture you can create. While I use a spray paint for this entire space, the above technique gives you a equally great finish.
Step 13: Sand Between Paint Coats
Yes.
More sanding.
I know!
But this is one of those little details that separates a painted DIY project from something that looks professionally finished.
Once the paint is sufficiently dry to recoat according to its instructions, inspect it.
If necessary, lightly sand with fine sandpaper.
You don’t need to aggressively sand every inch. Focus on smoothing:
- Dust particles
- Roller marks
- Tiny drips
- Rough areas
- Raised imperfections
Then clean the surface again before your next coat.
Step 14: Apply Your Second Coat
Your second coat is where things really start coming together.
Suddenly the IKEA boxes, MDF, filler, trim and face frames begin looking like one continuous piece of cabinetry.
Depending on your paint color, primer and application, you may need two or three thin coats for the finish you want.
Don’t try to compensate for poor coverage by making your final coat extremely thick.
Another thin coat is better.
Roller or Paint Sprayer: Which Is Better?
You absolutely do not need a paint sprayer to get a beautiful finish on IKEA furniture.
A good foam/fine-finish roller combined with an angled brush can give you an excellent result.
A roller is great if:
- You’re a beginner.
- You’re painting a smaller project.
- You don’t want overspray everywhere.
- You’re working inside the house.
- You don’t want to spend hours masking the room.
A sprayer is great if:
- You’re painting a very large project.
- You already know how to use one.
- You can properly mask the surrounding space.
- You want an extremely smooth finish.
- You have lots of detailed areas.
But spraying isn’t automatically easier.
There is a LOT of prep involved.
You have to mask everything, protect from overspray, get your settings right, maintain the proper distance and speed, and then clean the sprayer.
And yes you can still get drips with a paint sprayer.
If you’re new to spraying, always practice first.
Should You Spray Shellac Primer?
Be careful here.
Shellac-based primers require the correct equipment and cleanup method, and not every homeowner-grade paint sprayer is appropriate for every coating.
Check your sprayer manufacturer’s instructions before putting shellac primer into it.
If you’re unsure, use a roller and brush for the primer.
Replacing a foam roller is much cheaper than replacing your paint sprayer!
Do You Need a Topcoat?
Not necessarily.
If you’ve used a quality cabinet or trim enamel designed to cure into a durable finish, I generally don’t think an additional clear topcoat is necessary for a closet.
A separate topcoat also introduces another variable.
Some clear finishes can alter the appearance of your paint—particularly over light colors.
If you decide to use one, make sure it is compatible with your paint and test it somewhere inconspicuous first.
For me, I’d rather choose a durable paint from the beginning.
The Most Important Step: Let the Paint Cure
You’ve finished your last coat.
The closet looks AMAZING.
You immediately want to put all your clothes back.
Don’t.
Paint being dry to the touch doesn’t necessarily mean it’s fully cured.
This is especially important with shelves and drawers.
If you put heavy objects, organizers or baskets onto partially cured paint, they can stick to the surface or leave impressions.
Follow the cure-time instructions for your particular paint and baby the finish during those first days.
You’ve already spent this much time on the closet.
Give it the time it needs.
How to Prevent Your Painted IKEA Furniture From Chipping
There isn’t one magical product that makes IKEA paint indestructible.
Durability comes from the entire system:
Clean → Scuff → Remove dust → Prime → Cure → Smooth → Paint thin coats → Allow paint to cure
Skip several of those steps and even expensive paint may fail.
Do them correctly and you can get an incredibly durable finish.
What If the Paint Scratches?
Don’t panic over a tiny chip.
Furniture gets used.
If you eventually get a small chip:
- Lightly sand the damaged area.
- Clean away the dust.
- Spot-prime if you’ve exposed the original IKEA finish.
- Allow the primer to dry/cure according to its instructions.
- Touch up with your paint.
This is another reason I always keep a small amount of my project paint after finishing.
Label that can!
Write the room, project, paint color and finish on it.
Future you will be very grateful.
What If the Paint Starts Peeling?
A tiny chip and a sheet of peeling paint are two very different problems.
If large sections are peeling off, the problem is usually underneath the paint.
It could be poor surface preparation, contamination, insufficient adhesion or incompatible products.
Unfortunately, simply painting over peeling paint won’t fix it.
Remove the loose coating, sand the problem area back to a stable surface and rebuild your primer and paint layers.
Common Mistakes to Avoid When Painting IKEA PAX
1. Painting directly over the IKEA finish
This is probably the biggest mistake.
Don’t assume that because paint initially sticks, it will remain stuck after months of use.
2. Sanding too aggressively
You’re scuffing the surface—not trying to turn your PAX into raw wood.
3. Skipping primer
A good bonding primer is one of the most important parts of this entire process.
4. Applying thick coats
Thicker does not mean stronger.
Several thin coats give you much more control and usually a smoother finish.
5. Ignoring drying and curing times
This project involves a lot of waiting.
Unfortunately, there’s no shortcut around chemistry.
6. Putting everything back immediately
Don’t ruin your hard work because you’re impatient to organize the closet.
7. Forgetting to test your products
Before committing to your entire closet, test your primer and paint system on a hidden section or scrap/sample material whenever possible.
My Biggest Tip for Painting IKEA Furniture
If I could give you only one piece of advice, it would be:
Spend more time preparing the surface than you think you need to.
Painting is the fun part because you immediately see the transformation.
Prep isn’t glamorous.
Nobody watches a Reel and gets excited about watching someone remove sanding dust for 20 minutes.
But prep is what determines whether your closet still looks amazing months and years later.
How I Made My IKEA PAX Look Custom
Painting was only one part of this transformation.
What really changed the entire appearance was combining several relatively simple upgrades:
IKEA PAX + raised base + fillers + face frames + trim + caulk + paint = custom built-in closet.
Once everything is painted the same color, your eye stops noticing where the IKEA unit ends and the custom trim begins.
Instead, it reads as one piece of cabinetry.
And that was exactly what I wanted.
I wanted the functionality and affordability of IKEA PAX with the appearance of a much more expensive custom closet.
Is Painting IKEA PAX Worth It?
For me?
100% yes.
It is definitely more work than assembling the wardrobes and calling it done.
There is sanding.
And priming.
And waiting.
And sanding again.
And painting.
And more waiting.
There will probably be a point somewhere in the middle when you look at your disaster of a closet and question every decision that brought you here.
I definitely did.
But once the trim and paint start coming together, the transformation is incredible.
If you’re willing to put in the prep work, painting IKEA PAX is one of the best ways to take an affordable closet system and make it look completely custom.
And if you’re working on your own IKEA PAX makeover, save this guide before you start—because the painting is easy. The secret is everything you do before the paint goes on.
Share this:

Categories: Uncategorized

