
I had to share this backstory especially since this post talks about Shiplap. My definition of DIY was pretty much painting pots or painting furniture, nothing that really involved power tools. Until, one day I came across HGTV’s show Fixer Upper (I was very late to the party but better late than never). After watching couple of HGTV shows I almost believed I could build a house. At this point I only owned a power drill. LOL. This show really exposed me to the world of design and Shiplap. I knew for sure I wanted shiplap in my space.
Being raised in India, working with tools or building things were something that I was never exposed to. So with my limited TV knowledge I looked up to supreme Google, went in super research mode, got my tool list and head to Home Depot. For a newbie I will admit it was highly intimidating when I stepped in. All I knew was I need a brad nailer, when I went in there were so many options, 16guage, 18 guage. I was so lost.
There enters Brad! I am so grateful to have come across such incredible people in my life.. Brad worked at Home Depot and I am sure he knew I had no idea what I was doing at the store. I told him my project idea, project list and we started collecting the tools. In no time the estimated cost for supplies ran around $1000!! LOL. Remember, I never thought I was going to do more than just a shiplap, so he suggested I should just rent the tools. He also suggested I could try checking Harbor Freight, rates were way less than other big brands but tool life may be limited. So I picked all the tools from there, most of them are now replaced. If I were to do it again, I would pick a branded tool from start. I am listing the tools I use now and if you are beginner I would highly recommend investing in those!

Materials
Quarter round molding for edges
Tape measure
Spacers ( I used craft sticks)
Paint of your choice – I used French gray from Sherwin Williams
Paint brush/roller
Level
Painters tape
Stud finder
Let’s do this!
Here are some tricks I learnt along the way:
- Get your planks cut to size from your store. I got mine from Home Depot. They cut the boards for you at a very minimal fee.
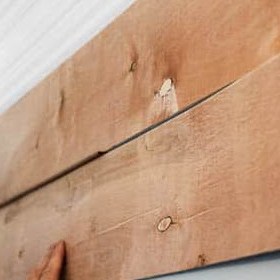
- The saw that HomeDepot / Lowes use to ‘rip’ the boards down into planks is not a finishing saw. So, be prepared to sand each board.
- Purchase an extra sheet so you can be selective with your planks. Some of our boards weren’t entirely straight so this helped!
- Start from the top. A smaller plank is less noticeable at the base of the wall.
- You can use nickels to space the planks, I just prefer the jumbo sticks. you will never run short!
Step 1: Do your math and Cut Your Faux Shiplap Strips
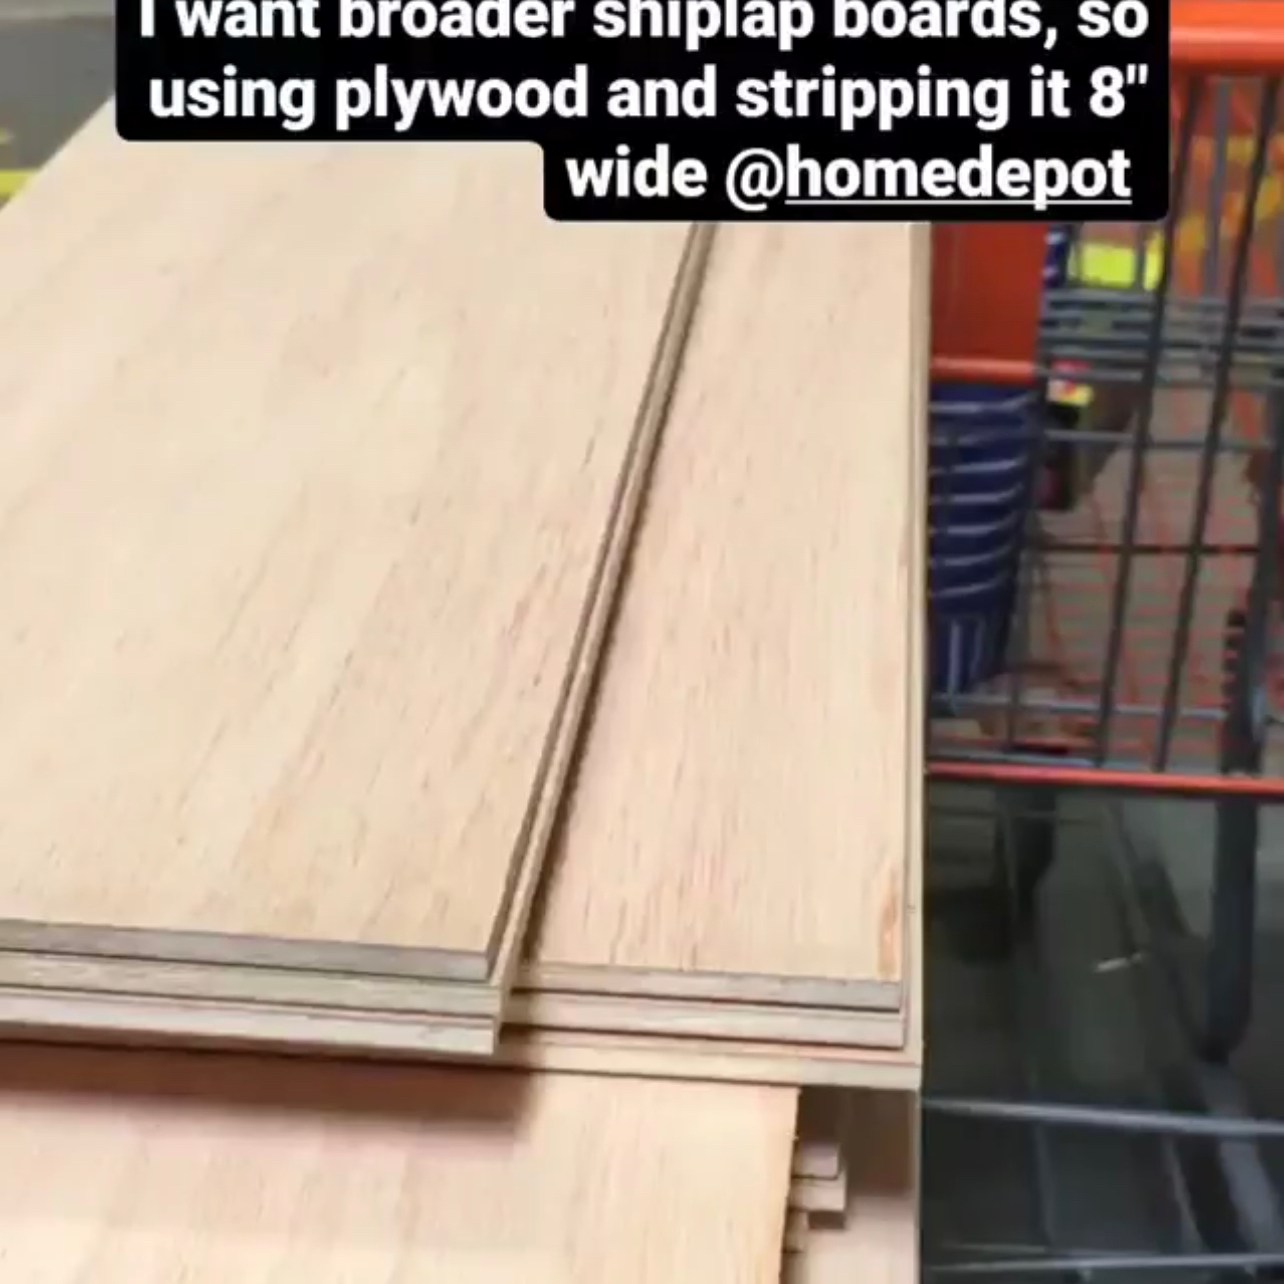
I used underlayment plywood to make this very budget friendly, you can even use MDF or plywood instead. The board start as 8ft x 4ft pieces, these can be purchased at any big-box home improvement store. Now this sheet of plywood is 32 square feet of wood. So, what you’ll simply need to do is measure the wall you want to cover and divide by 32 to get a rough idea of how many sheets you need to buy. I then add one extra to that number.
For our wall, we cut each sheet of plywood into 8-inch strips. I really wanted to get a chunkier look. I have seen many people go for 6-inch or 4-inch.
We cut our board to 8″ planks at the Home improvement store for a small fee. Just make sure to call ahead and let them know, surprising them to cut 40 strips of plywood may not be the way to go! You want the cuts along the grain of plywood meaning 8ft long and not 4ft.

Step 2: Sand and prepare the wall
If you are cutting these planks at the Home improvement store make sure to sand all the edges down. Blade they use is not a finishing blade so this step is crucial. Next, if you are going from a dark to lighter wall then prime the walls.
Mark all the studs using your stud finder and draw a line. This will mark where the nails would go.


Step 3 : Install your shiplap
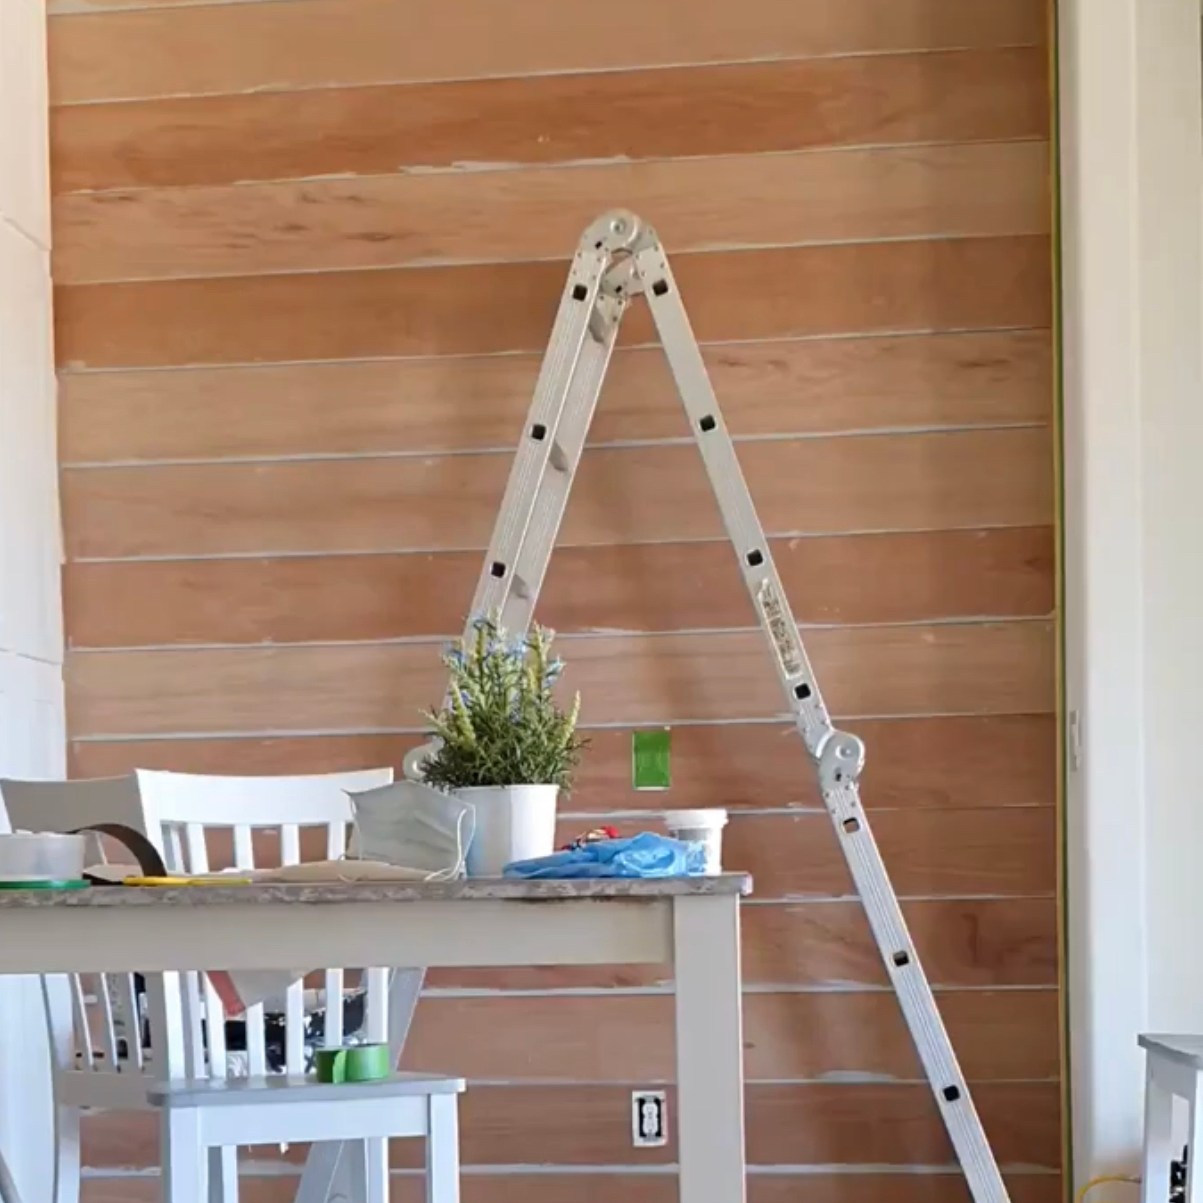
I cannot emphasize on starting from the top, that is the most visible area when you look at your room. Let the weird uneven planks go on the base which are going to be likely hidden by your furniture.
Place the first board on the top. Check if its straight using you level and nail it to the walls with your brad nailer making sure you hit as many studs as possible. I didnot apply any liquid nails because if I decide to take this down some day I wouldn’t damage my walls. Once the first board is up, take your paint and go over the edges and the back wall to cover approx 1 inch. DO NOT MISS THIS STEP. It will save you SO much time later! Now, take the next plank, paint the upper edge. Now, hold the spacers between the two planks and using brad nailer secure it to the wall. This gives some dimension to the shiplap and appears like real shiplap. Paint the lower edge and the back wall and repeat for the remaining planks.
Step 4: Fill all the nail holes and caulk the edges
I love finishing touches but I don’t like this part. LOL. But this step makes all the difference. Once you have nailed in the wall, you will have to go and fill all the nail holes with your wood filler. This hides all the nail holes making a more polished look. Taking your putty knife or finger tips, apply wood putty to your nail holes. We also apply it to the ends of your strips where they butt up to each other. Allow it to dry according to the directions on the package, and then sand down flush using an orbital sander or sandpaper.
Then I caulk the edges of the shiplap where the wood meets the wall. This step is so rewarding!!
Step 5 : Paint the wall
Now the wall is ready to paint. There’s not a ton of advice here except that sanded plywood will SOAK UP the first coat of paint. If you are trying to cut costs and skimp on your paint, you may find yourself needing three coats. Using a primer helps cut the cost. We used a higher-end, “one coat” paint and still needed two coats. Since we have space between two boards inevitably, you’ll get paint in between your boards. You can take your putty knife/ business card /envelope or a pocket knife, and as the paint is drying, simply run it between the boards, wiping the excess off your knife with a rag to prevent buildup.
and TADA she is ready!!
What do you think? Such an amazing way to add so much character to your space!!
I have all the steps recorded as stories on my Instagram page. I would love to have you there as part of my IG family!!


Share this:

Categories: DIY, Easy Build, Home Decor

Leave a comment