
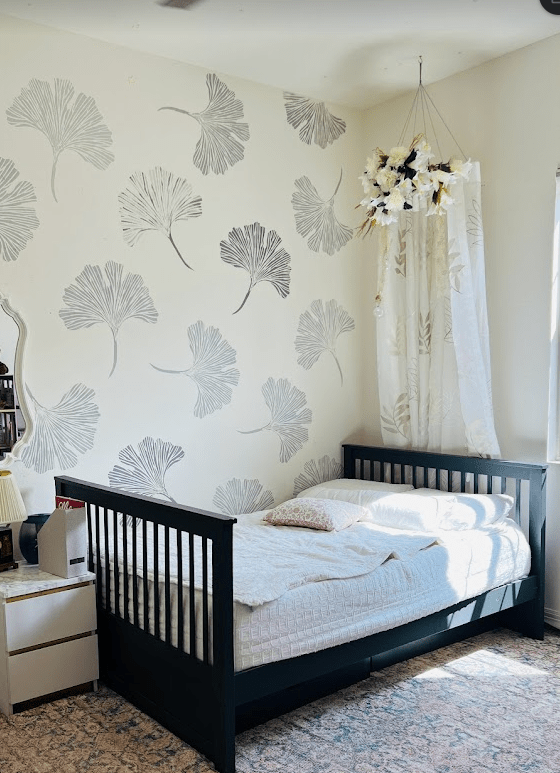
When we moved into our new home, one of the very first projects we tackled was revamping my daughter’s room. Something about your first born, you always tend to do extra! So, armed with a paintbrush and zero power tool skills, we went painted the walls with a fun ginkgo leaf stencil. Voila, room done! Boy the joy that came after this was surreal!
Fast forward a bit, I picked up power tools and leveled up my DIY game. But my daughter, she’s got dreams – wanted the room to be moody and cool. So, with my newfound skills, we set our sights on a grander vision.
Here’s where it gets wild – I pitched the idea to Home Depot in this cool competition called Orange Tank. They said, “Let’s do it!” Can you believe it? Home Depot and me, DIY dream team! Let’s dig right into how we made this room go from “meh” to “wow”!
Materials Needed:
- Basecap molding
- Textured wallpaper
- Wallpaper paste
- Pole Wrap
- LED back light
- Small trim
- 1/4″ Hardboard
- Wood filler
- Caulk
- Painters tape
- Primer
- Paint
- Roller
Tools Needed:
- Miter saw OR THIS (if you are scared of handling power tools)
- Brad Nailer
- Drill
- Jigsaw
- Level
- Laser Level
- 2″ 18 gauge nails or adhesive
- Wallpaper tools
- Graco paint sprayer
Step 1: Plan Your Design
Begin by planning the layout of your picture molding frame. Consider the dimensions of your wall, the desired height and spacing for the frames, and any unique features you want to highlight. Our challenge with this room was an symmetrical wall to work with. On left side we had a closet door disrupting the symmetry. We came up with a clever solution to conceal this door ( a detailed blog coming soon) which not only eliminated the asymmetrical challenge but also presented us with a pristine, blank canvas on which to unleash our creative ideas. I knew that I had to hide this door, and easiest way to do that was by adding a long box that covered the door. To add symmetry we had an identical box on the other side and third, middle box was a larger box with a wallpaper in it.
Few options to consider during planning:
Cost : Based on the trim you choose, cost can easily add up. My initial plan was to add trim all across the room but looking at how expensive wood is right now and with all the other elements we had planned in this space, I had to cut down the boxes to just 3.
Design : For our wall, three boxes felt just right. But you can go with many patterns and boxes based on your preference. One tip is to try and keep the box counts as an odd number.

Step 2: Why Picture Box Molding?
If you have seen my projects, you know I love working with trims. “Picture box molding” typically refers to a specific style of decorative molding or trim used on walls to create the appearance of framed boxes or panels. This type of molding is arranged on the wall to form rectangular or square shapes, resembling the frames of pictures or artwork. The result is a visually striking and structured design that adds depth and character to the wall. Not only is this design timeless and classic, it is totally beginner friendly to install too!
Step 3: Measurements, Material calculation
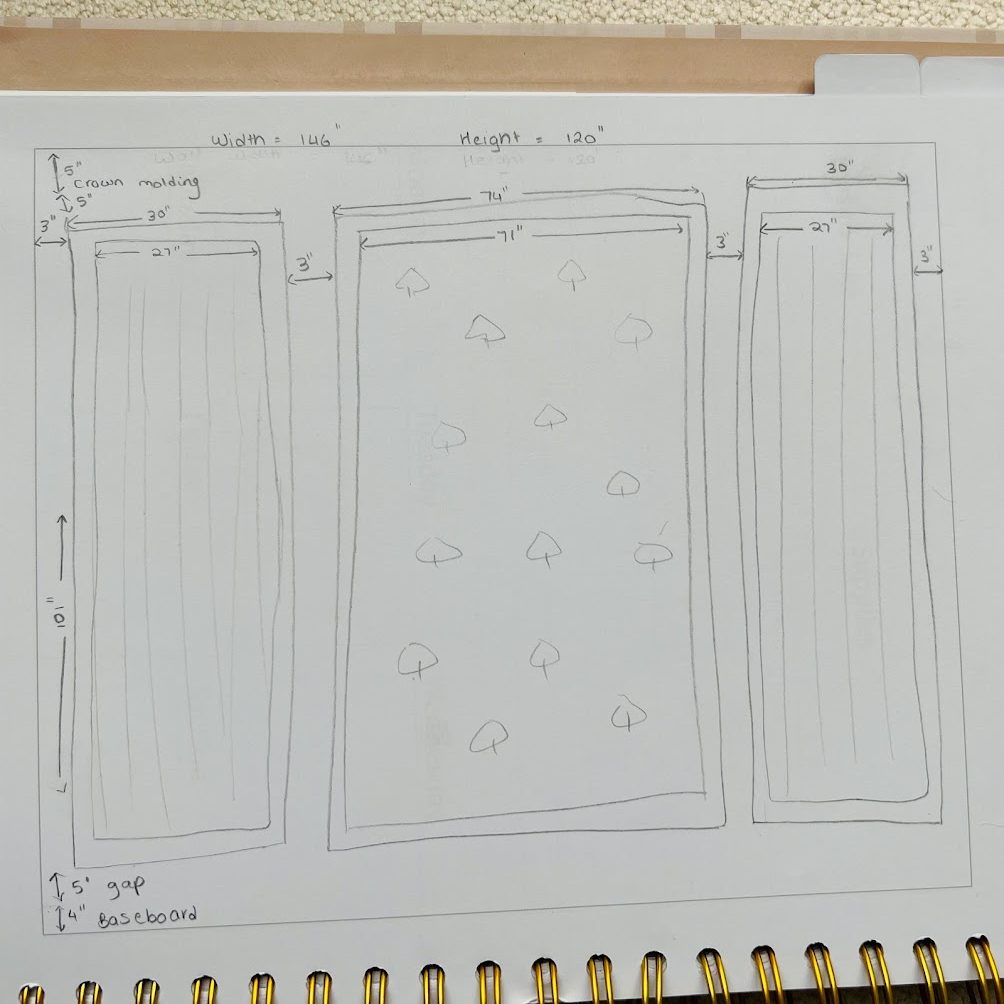
Next, let’s determine the measurements for our boxes. I spent so much time and energy on this step, but believe me it is so crucial and will make the project go so much smoother. We also taped the measurements to wall before we settled on these.
Our wall was 146″ long. I Knew I wanted space between each boxes as 3″.
For smaller boxes we wanted it to cover the door so we decided to keep them 30″ wide.
So, 146 – (3″ space – 30″ small box – 3″ – ? Big box – 3″ – 30″ small box – 3″) gives our big box as 74″.
For the vertical space, my walls are 120″ high. But I had plans to install 5″ high crown molding. Our baseboards are 4″ tall. I wanted around 5″ gap between the crown & baseboards with the box. So that made the total height of each box as 101″.
How much material?
Now that we have the box measurements, let’s calculate the material.
Small box : 2 x 30″ + 2 x 101″
Big box : 2 x 74″ + 2 x 101″
Typically the moldings come precut to 8 ft length. The basecap molding we chose is sold as linear foot. Since we knew exact measurement of each box we added a foot extra to each measurement and cut that length at the store. This pre-work helped us so so much in less material wastage.
Small box – we needed 60″ total width so we rounded it to 7 ft.
And since the height of each box was same we rounded them to 10ft.
For bigger box, the width was 74″, so we rounded that as well to 7 ft.
So for our wall we needed 4 moldings of 7ft length and 6 moldings of 10ft length.
We bought one extra 10ft length molding just in case there were any errors.
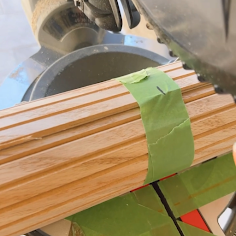
Step 4: Cut the molding
Now that we have the design and measurements ready, it’s time to cut the molding at an 45 degree angle. Keep in mind that with base cap molding, the thicker, curvier edge is going to be on the outside of the box. Here is what I typically do, start by carefully sliding your miter saw at 45degree mark on the right and cut the end of the board. I find it easier to mark the line and the direction I want to cut on the thicker edge. So I prefer to make the cuts with thicker edge towards me. I slide the miter saw now to the left side and make the final cut at the marked line. Since the blade is about 1/8″, I make sure to line the blade just to the left of my mark so I don’t cut into my measurement. Make all the cuts as per your measurements

Step 5: Cut the Pole-Wrap
If you ask me what was the most exciting part in this project, for me would be using Pole-wrap. I had seen so many fun projects using Pole Wrap on Instagram and was so excited to finally try it. I had this idea of adding Pole-wrap inside the picture molding boxes. It gives such a great dimension to this design. Handling the Pole-wrap is very easy.
Since my polewrap was going to be fit inside the box molding, to calculate the measurement – I just reduced the width of the molding from my box size. The molding width is 1.5 inches so the inner box was 27″ wide and 98″ high. I added half inch to these measurements and cut to size. The extra piece can be easily hidden under the molding but if you run short of material your design will show up the gaps.
The pole-wrap comes as a rolled sheet. First, unroll your sheet and mark the width using a pencil. Now using a utility knife cut along the paper section of the polewrap. Make multiple passes to avoid tearing or splintering. Next, roll back your pole-wrap and secure it with a painters tape so it doesn’t unroll when you make your lengthwise cut. Now, measure your length roughly and secure that area again with painters tape. Mark your final measurement on the painters tape. Using a miter saw make your final cut. Cutting it with painters tape on ensures that there are no splinters or tears and you get cleaner cuts.

Step 6: Wallpaper, calculations.
I had this grand vision for the room, you see, and Damask pattern was the chosen one. But oh, the challenge! The pattern had to be just right, and the color… ah, the color! Cue the suspenseful music as I browsed on the virtual aisles of HomeDepot. Patterns, colors, decisions – it was like a maze of design possibilities. And then, just when I thought I might need a wallpaper GPS, there it was, my eureka moment! And guess what it is PAINTABLE!! Yes, you read that right – paintable wallpaper! It was like stumbling upon a hidden treasure chest in the vast sea of design choices. I may have even done a little happy dance – after all, finding a paintable wallpaper was like striking gold in the world of home decor! 🌟
Calculating how much wallpaper you need gets tricky because aligning the pattern which means you wont use the entire roll and sometimes the excess wallpaper wont fit the remaining wall. The wallpaper I picked covers 57sq ft. My wallpaper area is 71″x 98″ which is approx 50 sq ft. But when I use the wallpaper calculator it suggested I buy 2 rolls.
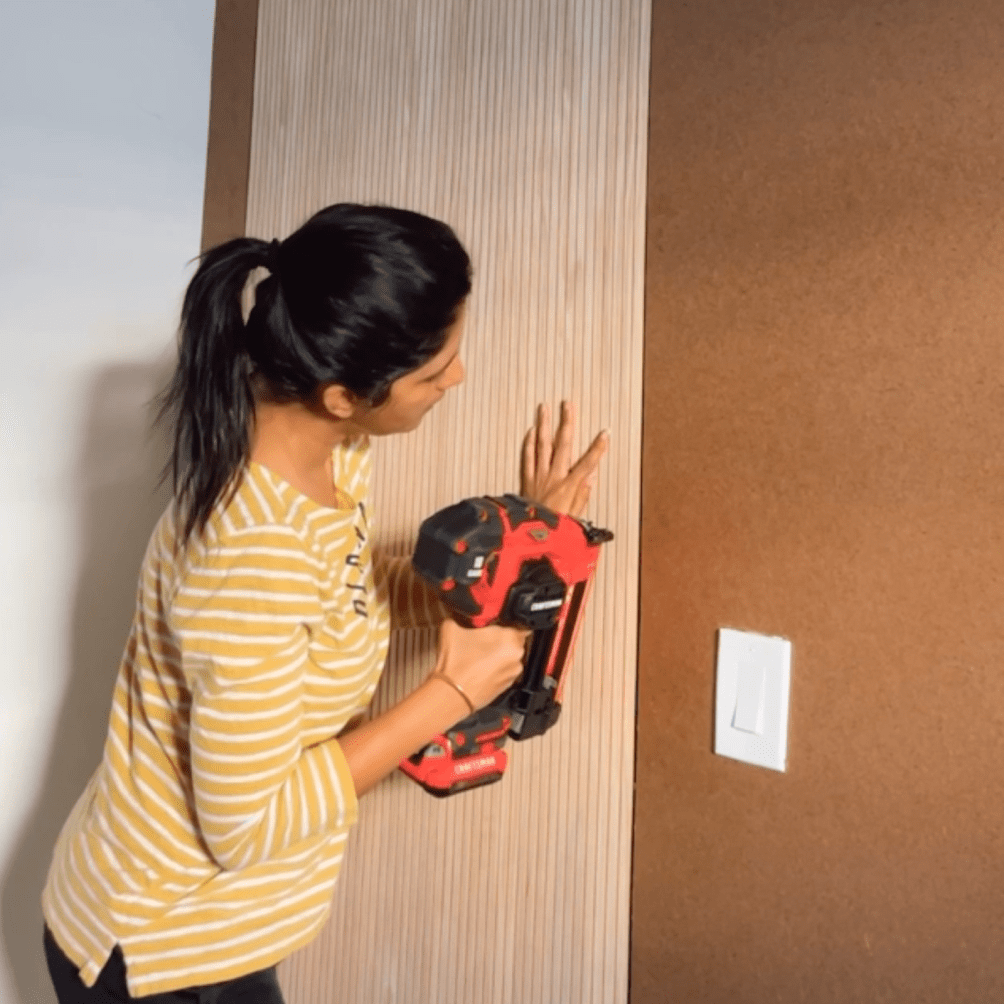
Step 7 : Install the backer board (optional)
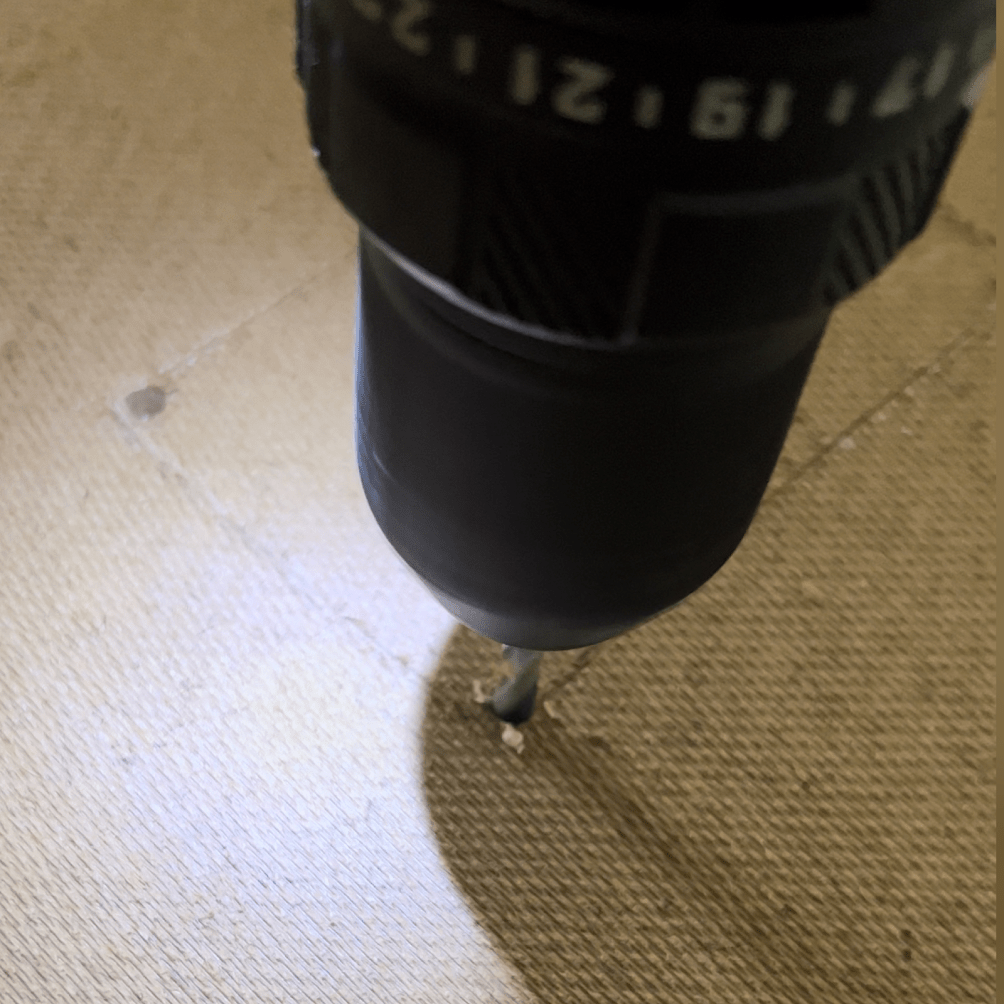
This step is optional. Since we had this vision of having a murphy door and we also have textured walls. To make the back wall look seamless we decided to cover the wall with 1/4″ hardboard. We started with marking all the studs. Using extra set of hands helps here. My husband held the hardboard pieces as I nailed them using the brad nailer. It was tricky to cut around the outlets but easiest way to get around it is to turn the outlet around and screw it back. Apply toothpaste (yes, hear me out) on the edge and now press the hardboard against it. You now have an impression that you can use. Using my drill and jig saw I cut around the template.


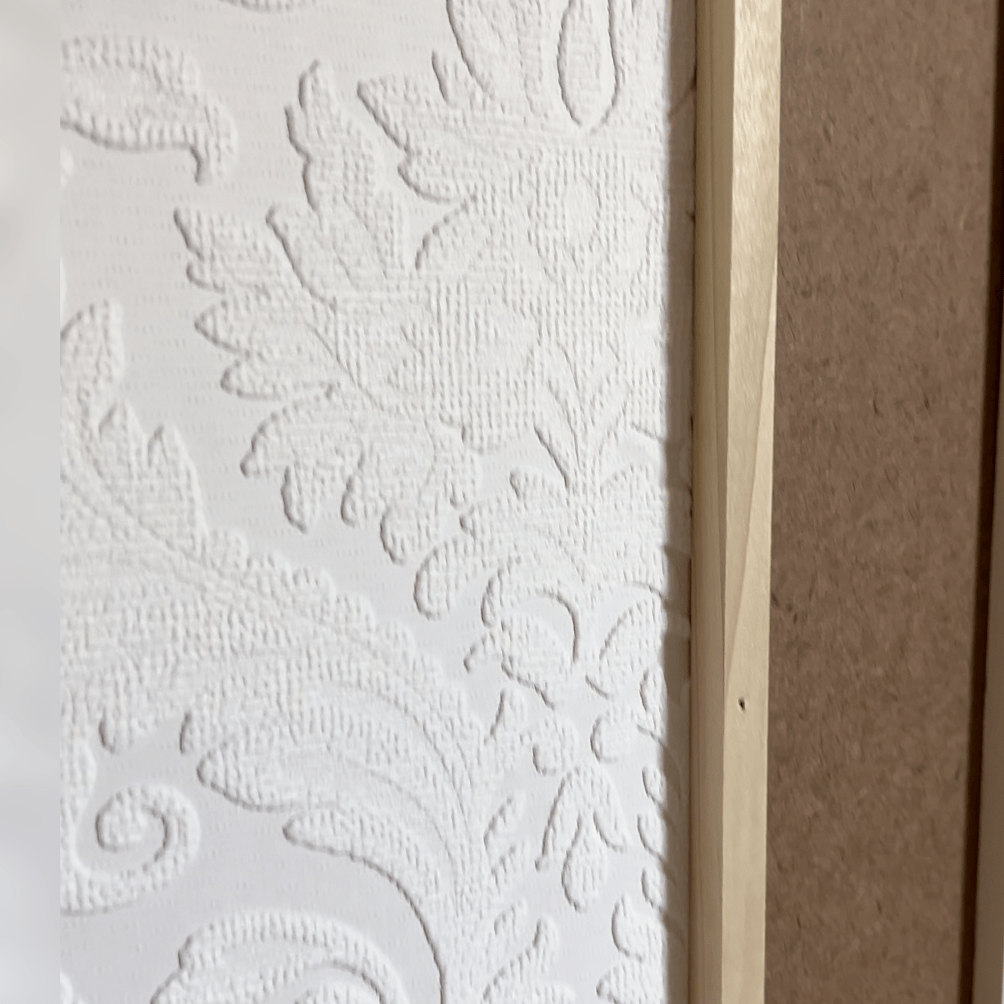
Step 8: Install the small box
Having the backer boards up and all the cuts in place, the hard part is behind us. Let’s get to install the box. One thing that will make the installation easy is having a laser level. Align the level to the position to install the pole wrap. It helps to have extra set of hands here. My husband held the pole wrap in place while I used my brad nailer to nail it against my wall. Once the pole wrap is in place, we added the trim pieces around it. There you have it the first box is ready! Second box which was around the door was a bit tricky and I will have a detailed post on how we tackled that. But after this step you should have two small boxes with polewrap and picture box molding in place.


Step 9: Install the wallpaper
Measure the height of the wall and add a few inches to allow for trimming at the top and bottom.Roll out the wallpaper on a flat surface, pattern side down. Measure and mark the length needed, and cut the wallpaper using a straight edge and a utility knife or wallpaper scissors. Lay the cut wallpaper face down on a clean, flat surface. Use a wallpaper brush or roller to apply an even coat of wallpaper adhesive to the back of the wallpaper. Ensure that the adhesive covers the entire surface, paying extra attention to the edges. Then “book the wallpaper”. Booking refers to folding the pasted sides of the wallpaper onto itself, adhesive sides facing each other, to allow the adhesive to activate without drying out. Fold the pasted sides toward the middle, creating a neat fold. Let it sit for the time specified in the wallpaper adhesive instructions.


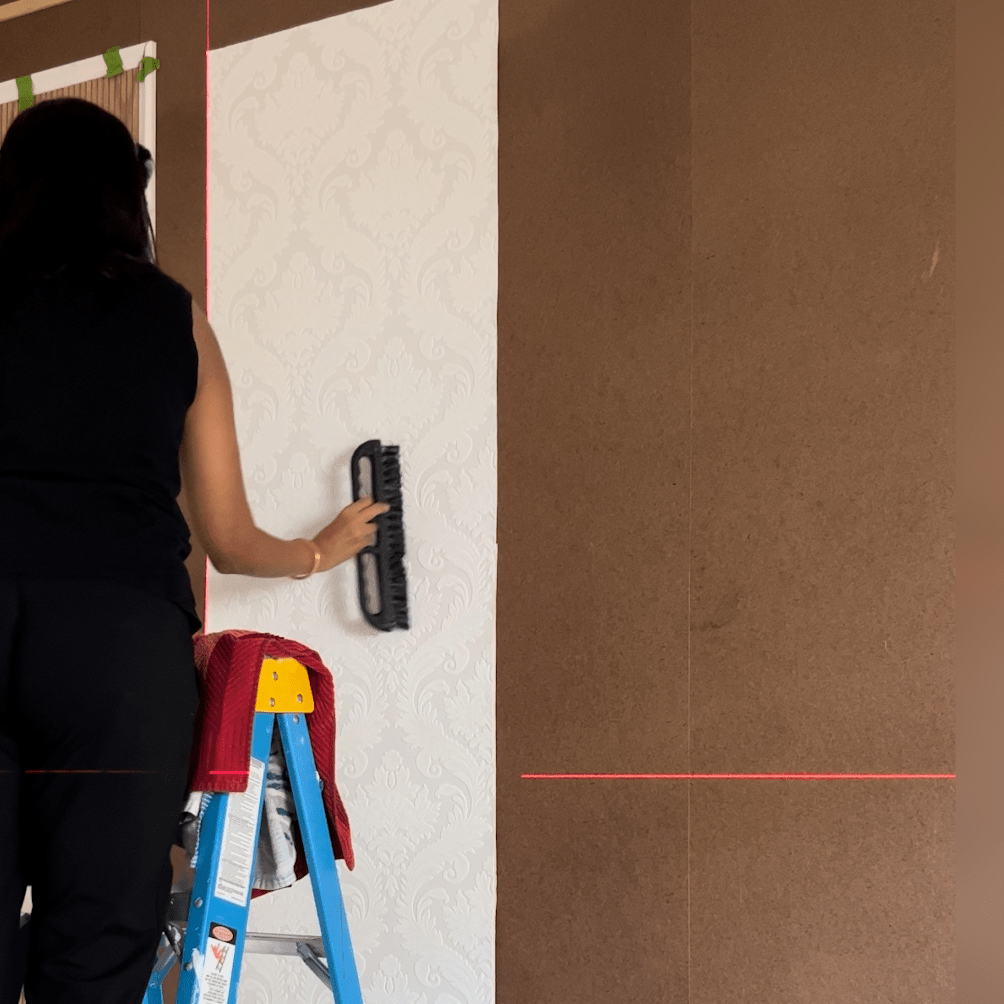

Unfold the top half of the wallpaper and position it against the top of the wall, leaving a slight overlap at the ceiling. Smooth the wallpaper onto the wall using a wallpaper smoother or brush, working from the center outward to remove any air bubbles. Use a wallpaper smoother or brush to smooth the wallpaper from top to bottom. Use a wallpaper seam roller to press down on the seams for a secure bond. Trim the excess wallpaper at the ceiling and baseboard using a utility knife or wallpaper scissors. Repeat the process for additional strips of wallpaper, aligning the pattern as needed for a seamless look. Use a damp sponge to clean off any excess adhesive on the wallpaper surface. Allow the wallpaper to dry completely according to the adhesive manufacturer’s instructions.
Step 10: Install Bigger box with lights
Choosing to exercise patience, I opted to let the wallpaper dry before proceeding to the next step. Perhaps it was a touch of cautiousness or simply reaching a logical stopping point for the day. Regardless, a pause in the action seemed fitting.
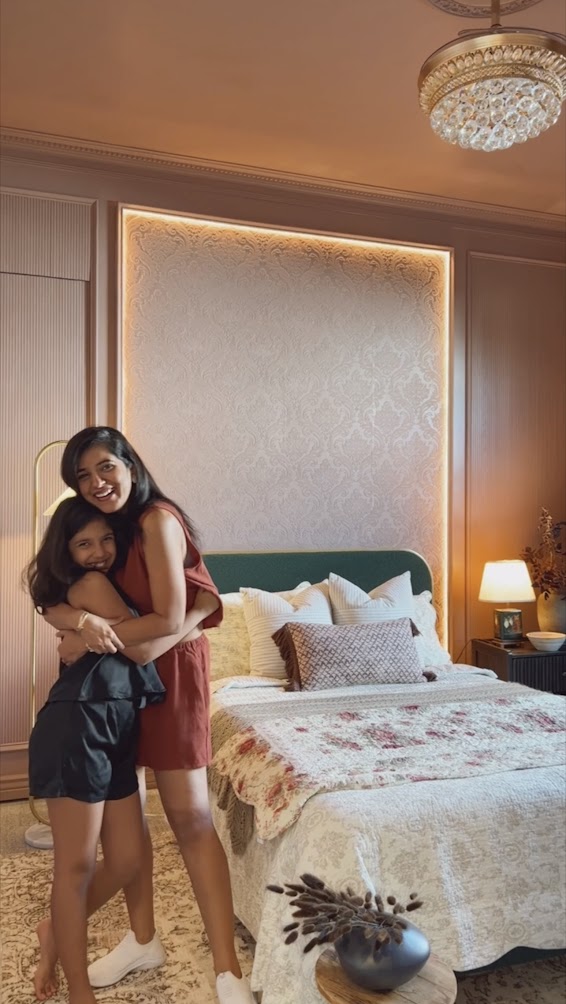
Now, onto the canvas—a larger box, a broader vision. Here, my creative whimsy took flight. I envisioned a playful addition, a touch of enchantment – enter moody lights! These lights, with their subtle glow, promised to dance across the wall, casting a spell of beauty and depth onto the freshly adorned wallpaper.
To bring this luminous spectacle to life, the trim piece needed a lift. Why, you ask? so it could hold the LED strip light that would soon become the radiant heartbeat behind the wallpaper.


I had 1/4″ square dowels from a previous project lying around, and they happened to be a perfect fit for the required elevation. Secure the square dowel in place, ensuring it aligns with the outer edge of our basecap molding trim. When nailing the dowels, it may not be essential to hit a stud every time. For added security in the trim, use alternate angles when driving the nails. Now nail the basecap molding on top of the trim pieces so that the outer edge aligns with the outer edge of trim. This will also a form a small pocket where the LED lights can sit. The lights I used come with a sticky side that can be attached to the trim piece. Wait until the room has been painted to put the lights.

Step 11: Finishing Touches
Now that all the trim pieces are, let’s to the finish line. This is one of the most crucial steps to make any build look custom and professional.
Fill nail holes. My go to method when nailing trims is add a painters tape at places you would nail. This way when you come to the finishing step, you can simply cover the nail holes using wood filler, wipe it down using a baby wipe and peel off the tape without having the need to sand. Here is a reel I made on this.
Caulk the edges – Cut the tip of the caulk tube at a 45-degree angle. The size of the opening will depend on the size of the gap you’re filling. Apply a continuous bead of caulk along the edge you want to seal. Use steady pressure on the caulk gun trigger for a consistent flow. Use a caulk smoothing tool or a wet finger to smooth the caulk bead. This helps create a neat and professional finish. Wipe away any excess caulk with a damp cloth before it dries. For a more precise application, you can use painter’s tape to mask off the edges.
Step 12: Prime & Paint
This part goes the fastest! I used a paint sprayer to get this job done but you can totally use a small brush to paint the trim first and a roller for the rest.
Some people choose to paint the trim pieces before they put them up. I tried doing this once, but found it easier to paint it all together using the sprayer went faster.

I used the paint color Sulking Room Pink by Farrow and Ball, but got it color matched by Behr. I used their Dynasty line and used the eggshell finish.
Cost
I owned all the tools needed for this project, so that is not included in this breakdown.
Moldings : $150
Pole wrap : $380 (Didn’t use all)
Wallpaper : $100 (Didn’t use all)
Wallpaper Adhesive : $21 (Plenty leftover)
LED light : $40
Inner trim for LED : $25
Hardboard : $56
Paint : $180 ( I used 3 gallons, have leftovers)
Primer : (leftover from previous project)
If I had to buy – caulk, wood filler, painters tape, bradnails, drop cloths etc I would account additional $50/$100
So we spent roughly around 1100 in materials. This project took us around 2 months to complete, but we primarily worked on it only over the weekends.
Final Thoughts
Creating a picture molding frame with textured wallpaper is a delightful DIY project that combines creativity with practicality. The versatility of textured wallpaper allows you to experiment with different patterns and colors, while the picture molding adds a timeless and elegant touch. This project is sure to transform your walls into a focal point that captures attention and sparks conversation. Elevate your home decor with this engaging and rewarding DIY endeavor!


Awesome work
LikeLike
Thank you so much!!
LikeLike
This is great work, Aboli! Inspiring to get started on DIY 🙂
LikeLike
Beautiful 🤩
LikeLike
So glad you like it! This makes me so happy!!!!
LikeLike
thank you so much!!
LikeLike
Beautiful work! Where did you plug the LED light strip so it doesn’t show?
LikeLike
Thanks for the detailed instructions. So the led strip is between the two frames – inner and outer? The wallpaper is in the inside frame, correct?
LikeLike
We have an outlet right behind the bed and under the frame, so it was perfectly hidden.
LikeLike
Yes, the wallpaper is inside the frame. The LED strip is stuck on the inner trim. Hope that clarifies it.
LikeLike
Great work! Room turned out beautifully. Inspired by you I am doing something similar for my sons room. Are you sure you used 1/4″ dowels and not 1/2″ dowels as 1/4″ are too thin and they are splitting when nailing.
LikeLike
Did you mean 1/4 inch hardboard? You may have to reduce your nail gun speed so that they dont split your material.
LikeLike
Great work! I want to do the same for my living room wall. How to hide the light wire going into the box?
LikeLiked by 1 person
Hi Aboli, thank you for this post. great work! It has given me inspirations to do my daughter’s bedroom. Is there any tutorial on how to make the door seamless? Thanks 🙂
LikeLiked by 1 person
I am so excited for you !! I have not written a blog on it yet. soon hopefully 😀
LikeLike
I luckily had the bed in front so the wire was hiding behind it. May be plan to have this stay behind your couch area
LikeLike
hi thank you so much for this inspirational article. Would you be able to share the name of your wallpaper? Thanks again
LikeLiked by 1 person
I have it linked above!
LikeLike