
In the era of chill vibes and convenience, imagine this: you’re cozied up on your couch after a marathon day, ready to binge-watch your favorite shows. But, uh-oh! the joy of lounging can quickly be disrupted when you realize your devices are running out of battery, and the nearest power outlet is playing hide-and-seek. Fear not, fellow comfort enthusiasts! I’ve got the ultimate DIY plan for you – let’s build a media/power outlet right behind your couch. Say farewell to inconvenience and wave hello to a universe where comfort meets technology seamlessly.

Materials Needed:
- 1×4 common boards (I used 3 – 8ft boards)
- 1.5 inch screws
- Power strip
- Wood glue
- Power Drill
- Jigsaw
- Sensor lights
- Paint and paintbrush (optional)
- Measure and Cut the Boards:
- Start with measuring the back of your couch where you want to place this charging station. I left 6″ width on each side lengthwise and 6″ height so that the station is well concealed behind our couch.
- For our couch, the length was around 7ft and height was 2ft.
- For this build, we bought 1×4 common boards. While selecting boards for your project, always make sure they are straight. My go-to method is holding the piece as shown below. Left piece is nice and straight, just what we need for our project.
- If you have your cut list, you can cut the boards at the lumber store itself. Since I have a miter saw I just preferred cutting them at home. Based on my measurements, I have two boards cut at 7ft and the third board into 4 pieces of 22.5 inches each. The longer boards will sit on top of each small board making the height 2ft.


- Assemble the Frame:
- Lay out the boards in a ladder-like structure. The longer boards will serve as the sides, and the shorter boards will be the steps.
- Apply wood glue along the edges where the boards meet to create a strong bond.
- Secure the boards together using screws to ensure stability. I have used clamps but if you don’t have these, use some extra set of hands.


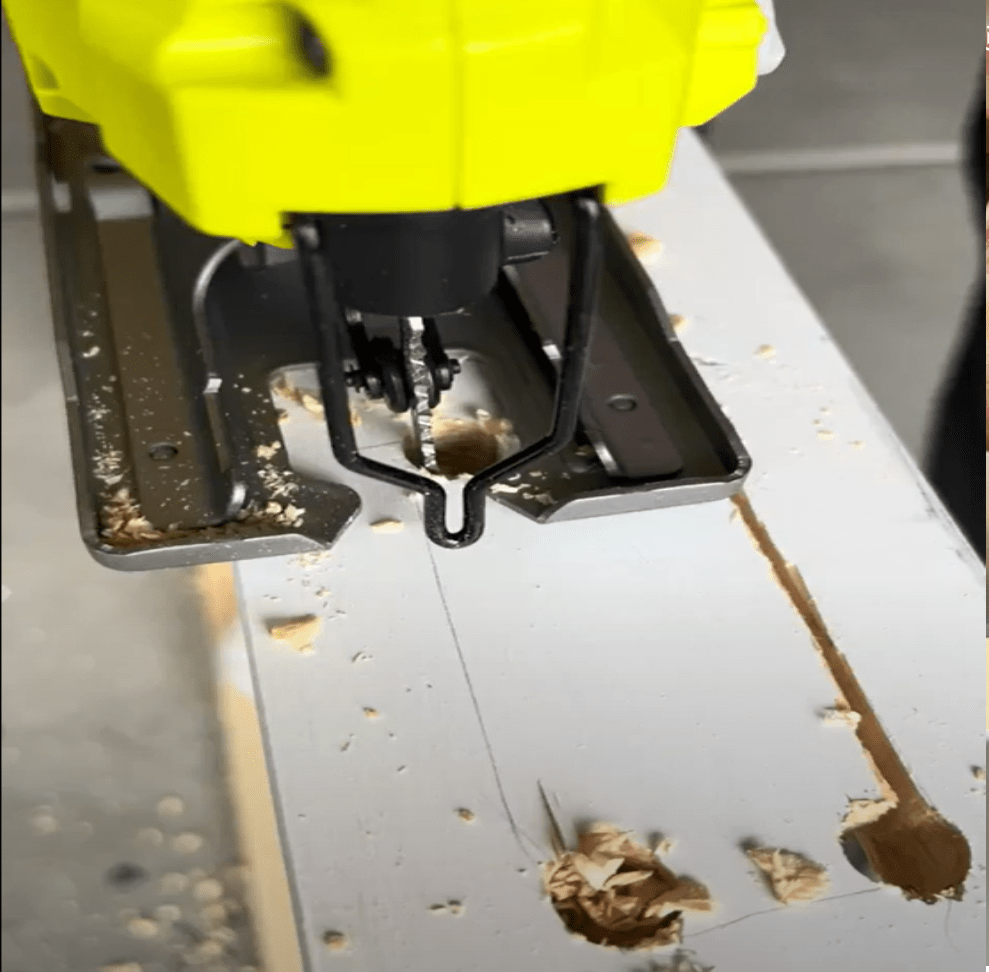
- Create Space for the Power Strip:
- Use a jigsaw to carefully cut out a shape in one of the longer boards to accommodate the power strip. This will allow the power strip to be inlaid and hidden within the structure.
- Inlay the power strip into the cutout section. Secure the power strip in place, ensuring it is firmly attached to the frame.


- Add Sensor Lights:
- To enhance the ambiance, I wanted to incorporate sensor lights into the design.
- Strategically place the sensor lights along the frame, ensuring they contribute to the overall aesthetic appeal.
- Test the lights to make sure they create the desired ambiance behind the couch.
- Final Touches:
- Double-check that all components are securely attached.
- Optionally, paint or finish the frame to match your room’s decor.
- Place the entire structure on the wall behind the couch, leaving the desired gap on either side.
Material Cost – Under $30
3 – common boards – $27
Screws – $2 ($12 pack but have enough leftover)
Wood glue – pre-owned
You can add fancy lights/power strip. I used the one I already had.
Power strip – 2 x $12
Sensor lights – $25
All tools – preowned
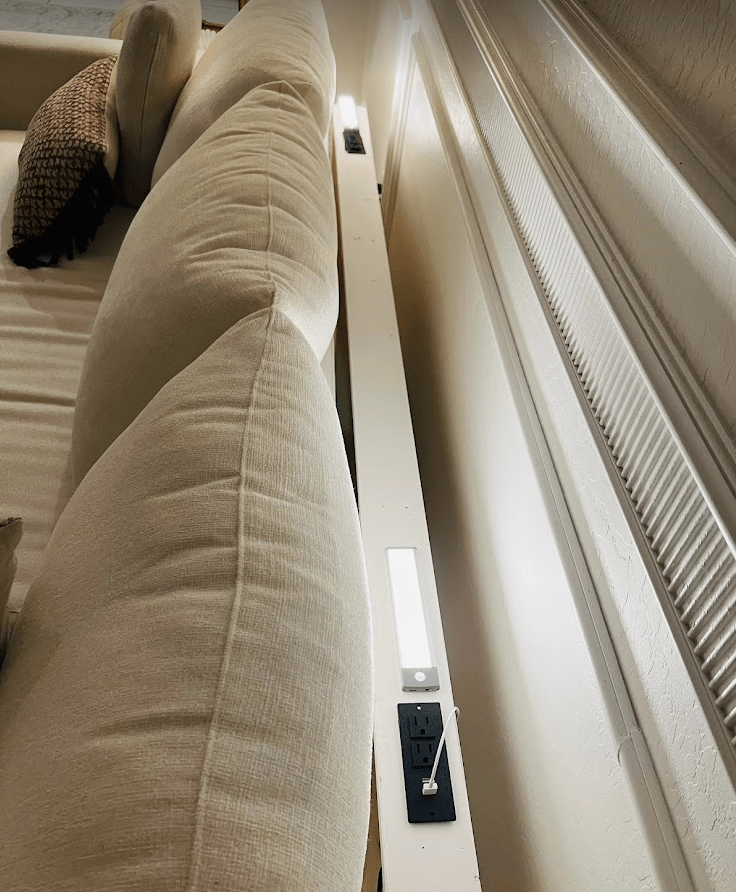
By following these steps, you’ve not only created a practical media/power outlet but also added a stylish and illuminated dimension to your living space. Enjoy the seamless blend of functionality and ambiance as you relax on your couch with all your devices powered up!
Share this:

Categories: Beginner Friendly, DIY, Easy Build, Home Decor
