
How I Built My Awesome DIY fountain- A Step-by-Step Adventure!
Every Diwali, I find immense joy in adorning my space with diyas and brass urlis. There’s something enchanting about filling the brass urli with water and fresh flowers, then floating diyas upon it. The sight instantly ushers in the festive spirit, creating a warm and magical ambiance. This year, I wanted to elevate my Diwali decor and was looking for ideas. During our lunch date, my husband and I were captivated by a water fountain situated just across our table. The tranquil sounds it made had a serene, Zen-like effect that left a lasting impression on us and that’s when I knew.. An Urli water fountain! The gentle sounds of the fountain creates a Zen-like festive ambiance. Surprisingly, this addition to my festive setup didn’t break the bank, costing me less than $20! The process was remarkably straightforward, and I’m excited to share the steps with you. So, let’s dive into this project and prepare to amaze your guests this Diwali.
Materials You’ll Need:
- Small plastic or metal plate (ensure it’s thick and sturdy)
- Large metal plate with deep base (Urli Similar to mine )
- Drill and small drill bit (for metal plate)
- Screwdriver and gas stove (for plastic plate)
- Decorative stones or pebbles
- A trusty water bottle
- Golden Spray paint
- A small water pump
- Clear plastic tubing (about 1/4 inch in diameter) (comes with above pump)
- Lotus Water Diya
- Flameless water tea light
- Water
- Decorative elements (optional)
Instructions:
Step 1: Prepare Your Top plate Start by selecting a small plastic or metal plate to serve as the base for your fountain. If using a plastic plate, ensure it’s thick and durable, so it won’t fall apart when filled with water. I found a suitable plate at Dollar Tree. To make the plate look appealing and festive, I spray painted it gold.

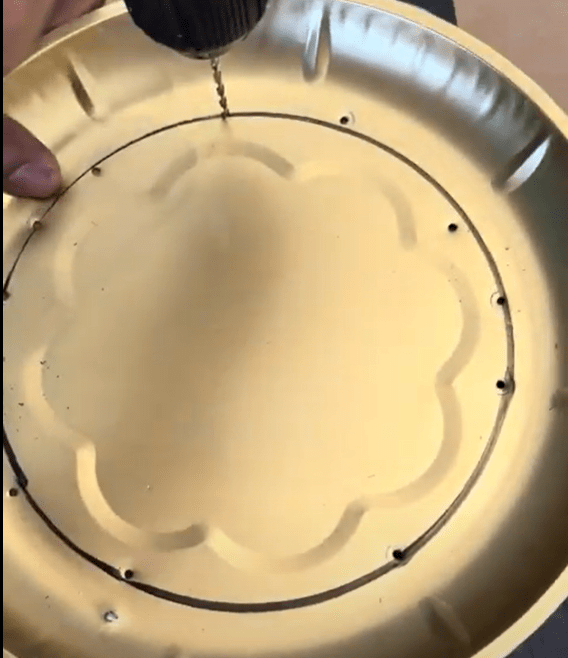
Step 2: Create Drainage Holes
- For a metal plate, begin by drawing a circle in the center to mark where your water will flow. Then, mark the spots where you want to drill small holes. Use a drill with a small drill bit to create these holes. Ensure they’re drilled downwards, evenly spaced and allow for the water to flow smoothly.
- If you have a plastic plate, you can achieve the same result by heating a screwdriver over a gas stove until it’s hot, then piercing it through the plate. The heat will melt the plastic, creating holes for the water to pass through. Make sure the holes are appropriately sized for the flow of water.
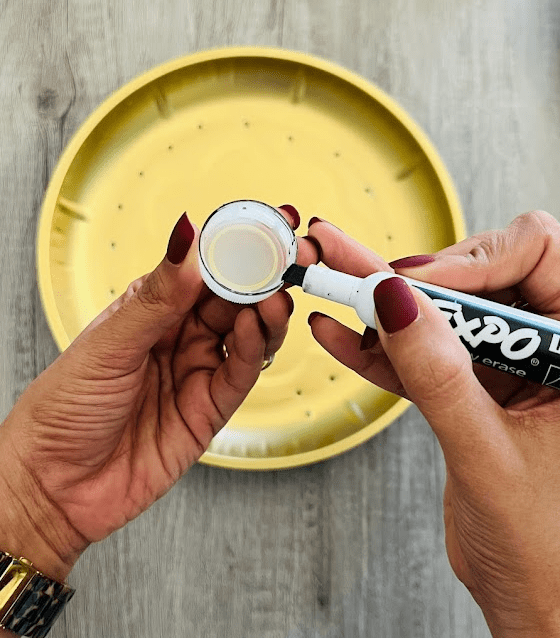
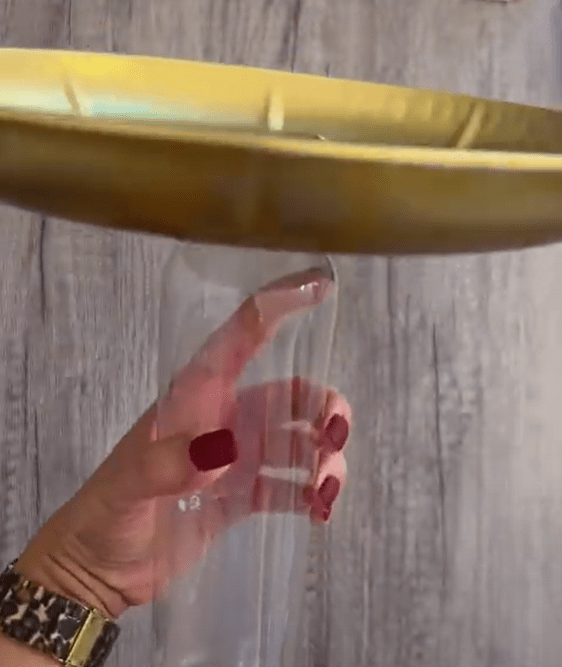
Step 3: Create the Water Bottle Reservoir
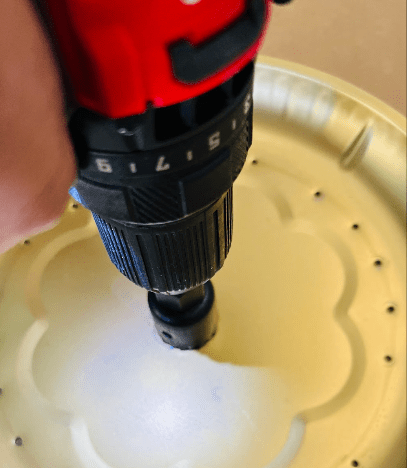
- Take a sturdy water bottle and, using the lid as a guide, draw a circle in the middle of the plate. Cut out this circle, so the water bottle’s opening fits perfectly in the center of the plate.
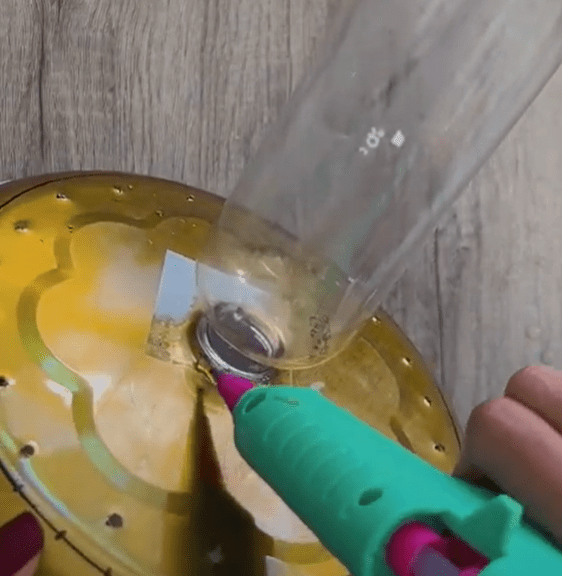
- Use a hot glue gun to seal both the top and bottom of the bottle’s opening to prevent any water leaks.
- Near the bottom of the bottle, create a small hole using a hot screwdriver for the tubing to pass through. Seal this hole with hot glue.
- Add decorative pebbles inside the bottle to ensure it stands sturdy.

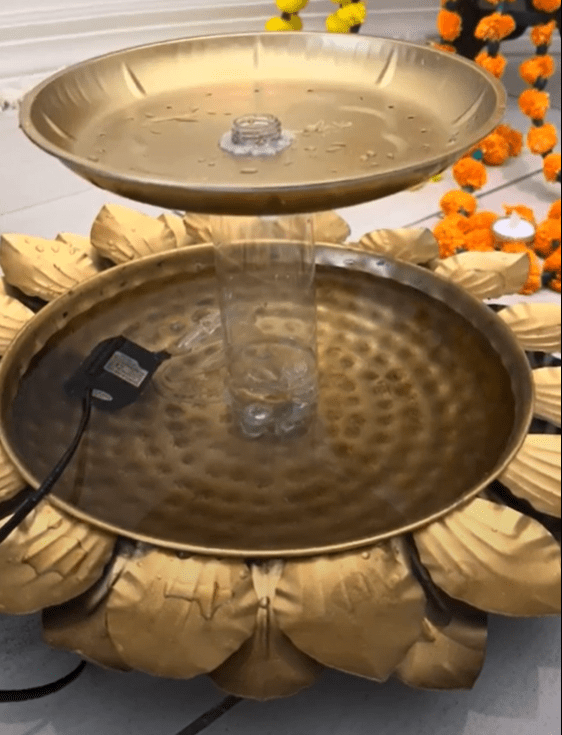
Step 3: Assemble the Fountain
Now it’s time to bring your Urli Fountain to life:
- Begin with a larger base plate to provide stability for your setup.
- Place the water bottle in the center of the plate and also add decorate pebbles to make sure it’s extra sturdy.
- Attach the small water pump to the bottom of the plate, positioning it next to the bottle. Ensure it’s secure and won’t move when the water flows.
- Connect other end of the clear plastic tubing to the water pump’s outlet. This will serve as your water source for the fountain.
- Fill the base plate with water, and as you power on the electric pump, watch the water rise through the bottle, creating a beautiful and mesmerizing fountain effect.
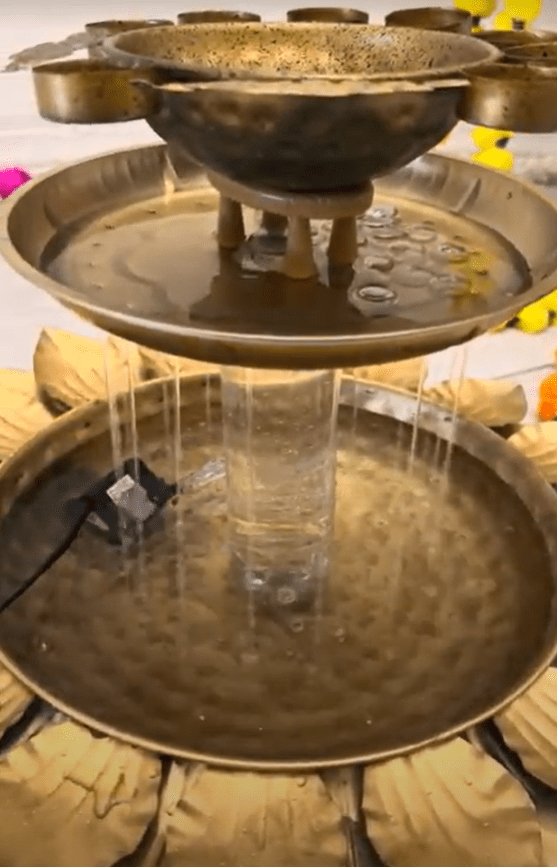
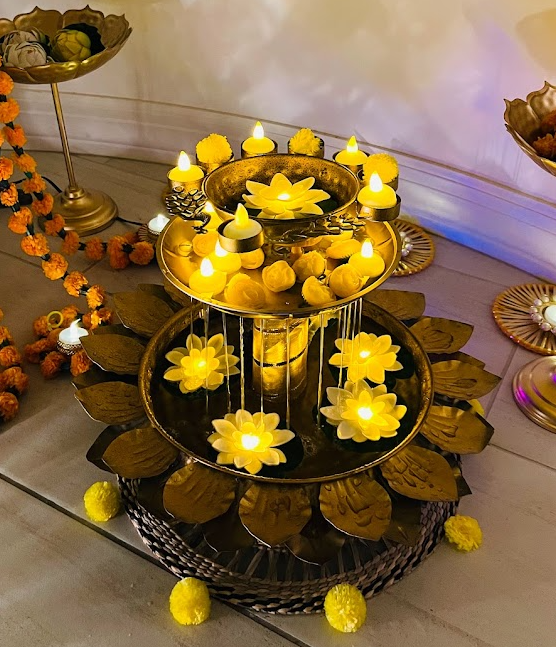
Step 6: Personalize Your Urli Fountain (Optional) Feel free to add extra decorative elements like flower petals, flameless water diyas, or decor around the fountain to enhance its aesthetic appeal.
Seeing my DIY fountain come to life was such a thrill! You’ve gotta try it too. Get your creative juices flowing and give it a shot. Don’t forget to snap some cool pics and share your experience with the world. Now you have a stunning and unique Diwali decoration that combines the charm of traditional diyas with the enchantment of a fountain. Enjoy your elegant creation and impress your guests this Diwali! If you recreate this, dont forget to tag me on Instagram! I would love to see!!

Share this:

Categories: Beginner Friendly, Diwali, DIY, Uncategorized
